Applying Fringes
Fringes applied to detail lines in your budget will help calculate the additional fees, taxes, and benefit costs above and beyond its base rate.
See Fringes for more details on how to setup and calculate fringes.
Apply Fringes
- In your budget select the Detail line (or lines) you want to apply Fringes to
- Open the Apply Tools Pane (if it's not already open)
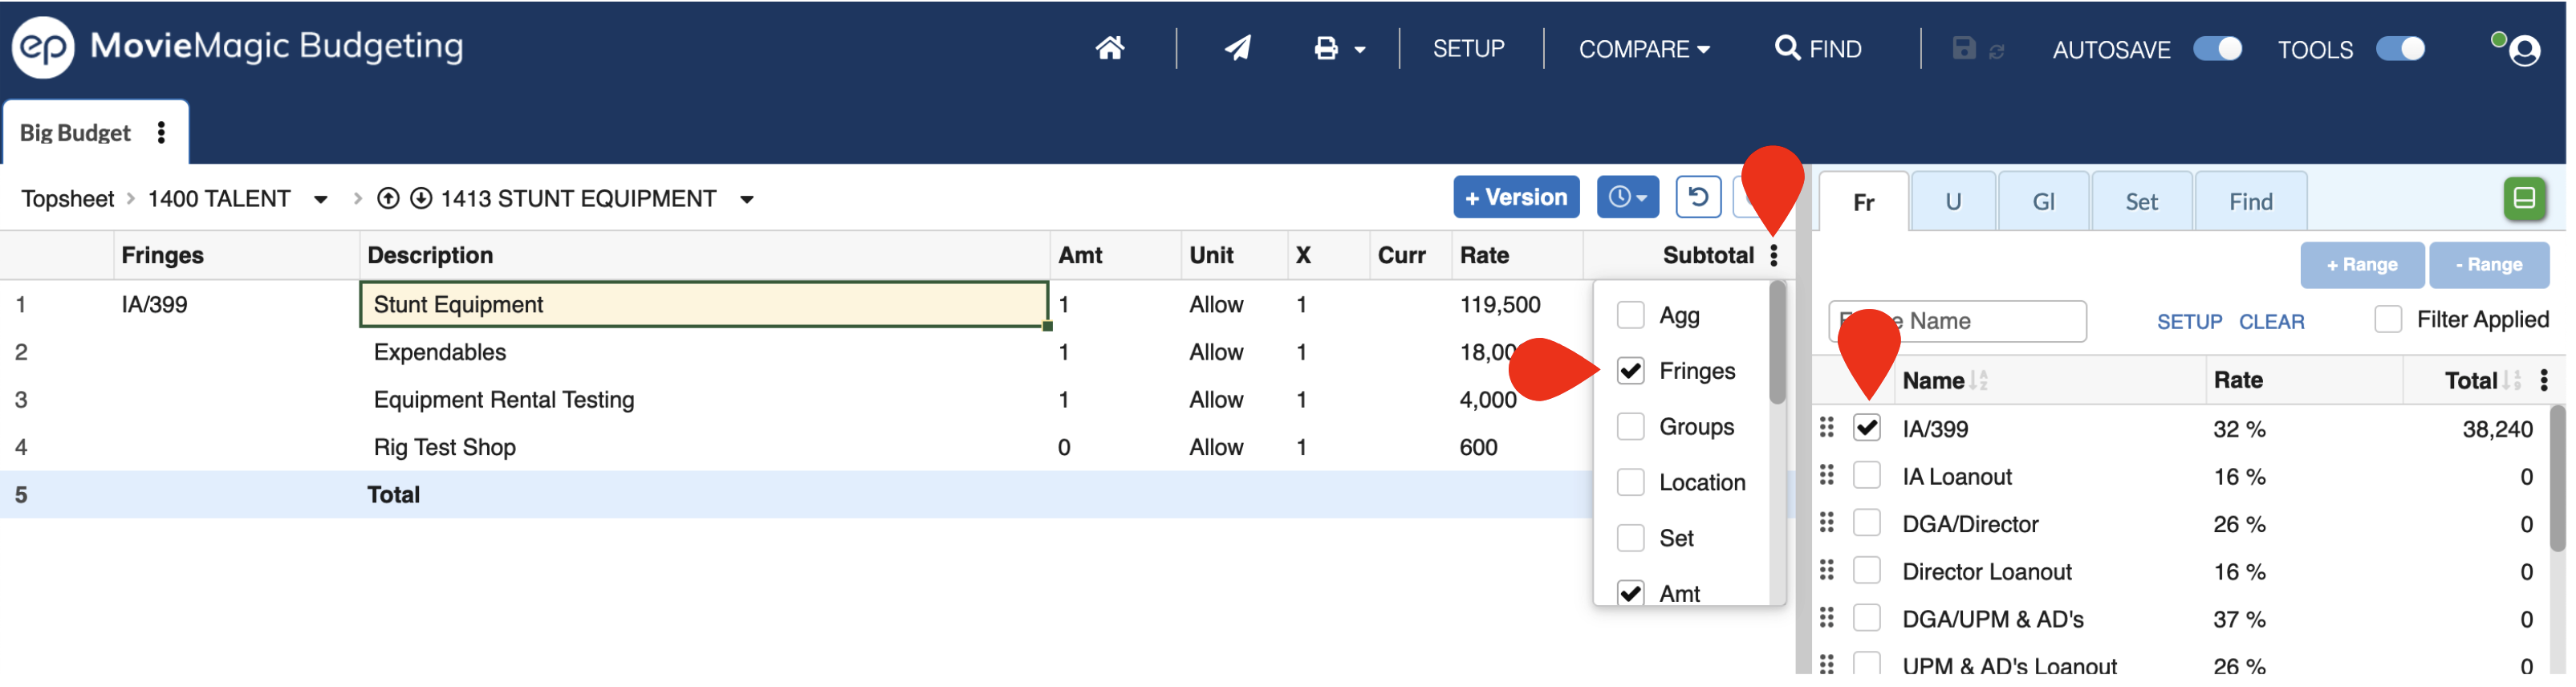
- Click to select the
Frtab- You can also press
CMD + 1on a Mac orCTRL + 1on a PC to jump to the Fringe Apply pane
- You can also press
- Click the checkbox next to the Fringes you want applied to your selected Detail lines
- You can also use the
UP ARROW,DOWN ARROWandSPACEBARkeys to select and apply Fringes when this pane has focus
- You can also use the
- Click to close the Apply Tools Pane
- You can also press
CMD + 1on a Mac orCTRL + 1on a PC to return to your budget from the Fringe Apply pane
- You can also press
Fringe Ranges
It is common to split the labor costs for a given resource across multiple lines in your budget (for example, Prep Weeks, Shoot Weeks, Wrap Weeks). However, fringes and their caps generally have to be calculated against the individual's total compensation.
To handle this, Movie Magic Budgeting allows you to set Fringe Ranges. These "groups" of lines calculate fringes as if they were one individual, ensuring that your fringe caps and percentages are accurate.
To set a Fringe Range:
- Select two or more contiguous Detail lines
RIGHT CLICKon those rows and selectMake a Fringe Range- You can also press
CTRL + Ron a PC orCMD + Ron a Mac - In the
Apply Fringespane you can click+ Range
- You can also press
The lines will now be included in a Fringe Range and a black bracket will display to the left of the rows in the budget. To remove a fringe range:
- Select one or more rows currently in a Fringe Range
RIGHT CLICKon those rows and selectRemove a Fringe Range- You can also press
CTRL + SHIFT + Ron a PC orCMD + SHIFT + Ron a Mac - In the
Apply Fringespane you can click- Range
- You can also press
The lines will now be removed from the Fringe Range. If no lines are left in the range then the black bracket will disappear entirely.
Calculating Fringes
Fringes are calculated against the value of the line (or lines in a range) that they are applied to.
Each fringe is calculated individually.
If it is a percent fringe then it will be calculated against the subtotal of that line/range before any fringes are included. If it has a Cutoff then it will only calculate the percentage against the smallest of the line/range subtotal or the cutoff value.
For example, assume there are a range of lines (Prep, Shoot, Wrap) for a Grip with a total compensation calculated at $30,000. If a FUI fringe is applied of 2.7% with a cutoff of $7,000, then the total of that fringe for this range would be $189 (2.7% of 7000). If they only worked one day for $6,000 then the total of that fringe for this range would be $162 (2.7% of 6000, lower than the 7000 cutoff).
Flat Rate Fringes are generally just that. A flat rate calculated once per line they are applied to, no matter what Units or Fringe Ranges may be used. However, if the Flat Rate Fringe uses a Unit with an HRS FLAT FR value, and if the lines in use have a primary Unit with an HRS FLAT FR value, the system will calculate the total fringe based on the relative calculation.
For example, assume you have a Fringe Range (Prep, Shoot, Wrap) for a Director with a total number of 30 Weeks worked. You may have a Unit of Week with an HRS FLAT FR of 40 and a Unit of Day with an HRS FLAT FR of 8. A Flat Rate Fringe of $10 per Day applied to all lines in the Director's Fringe Range would calculate out as $10 * 5 days * 30 weeks for $1,500.
Note: Flat Rate Fringes only pay attention to the primary Unit for a given line (immediately following Amt). The Unit2, Unit3, and Unit4 columns will not be considered when evaluating HRS FLAT FR calculations.
Posting Fringes
Calculated fringes for a line or range or account are not displayed on the lines to which the fringes were applied. They are instead totaled up and displayed in a special Fringe line depending on where Fringes are "posted."
See Fringe Settings in Budget Preferences for more details.
View Fringes
To see Fringes applied to a line you can enable the Fringes Column using the menu button (three dots) in the top right of the main budget pane to add that column.
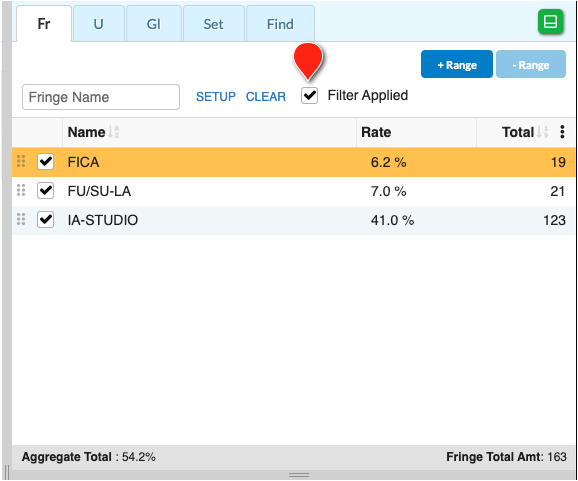
With the Apply Tools Pane open you can also see which Fringes are applied based on the checked boxes. Use the Filter Applied checkbox to only see Fringes that have been checked.
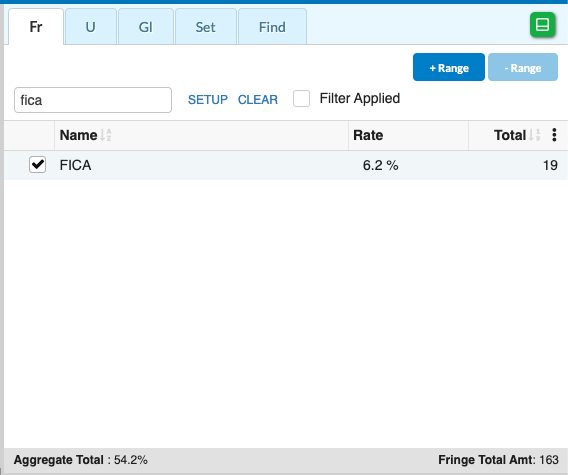
You can search for a specific Fringe in the Apply Fringes pane by typing the Fringe name in the search box.