Reports & Printing: Overview
You can print or generate a PDF report of your entire budget or selected parts of it at any time. The reports interface lets you make changes to the layout without altering your budget window, and "what you see is what you print."
Accessing Reports Setup
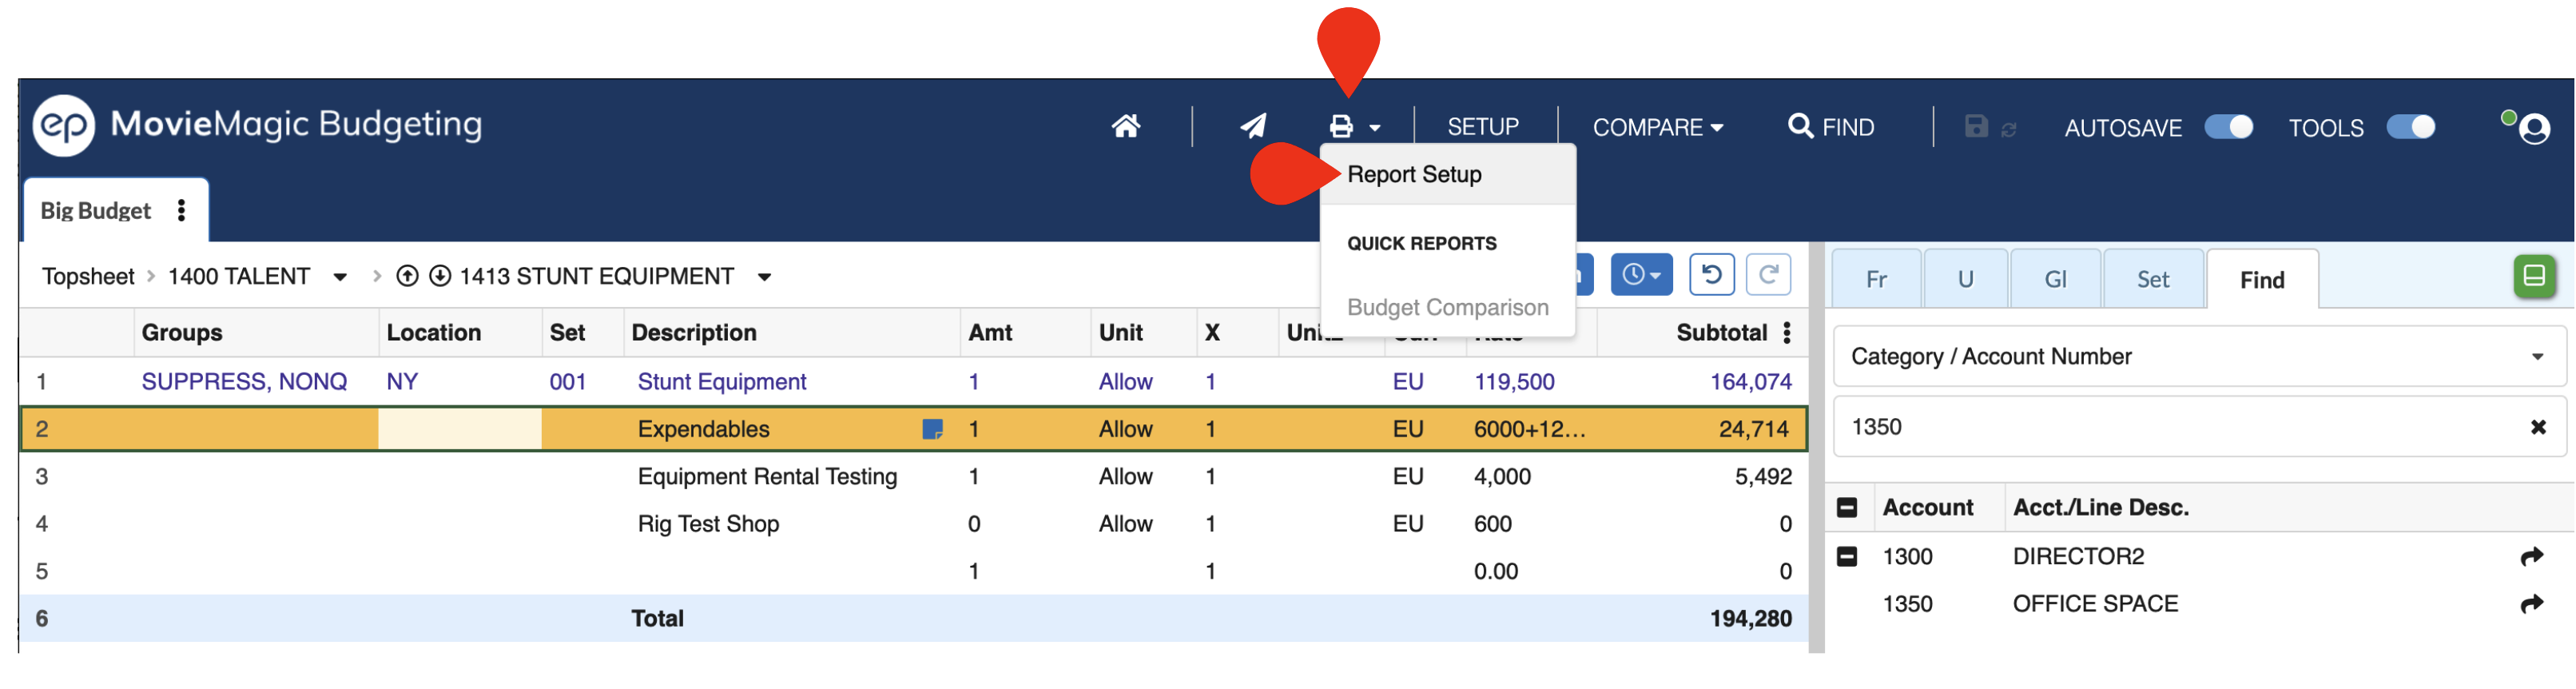
Click on the Reports drop-down in the top navigation bar and select Report Setup. You can also press CMD + SHIFT + P on a Mac or CTRL + SHIFT + P on a PC.
Report Templates
You can save multiple report arrangements as templates within this budget to make it easier to re-print any one layout.
Note: You must create a new template before making any changes to your report settings. Otherwise any changes you make are saved to the current selected template.
To create a new template:
- Open the
Report Setupscreen - Click
Templates for this Budgetin the top left - Click
New Report Template - Your new template is created with the name
NEW Untitled Print Template - Click the template name to edit or change it
To switch to and edit an existing template:
- Open the
Report Setupscreen - Click
Templates for this Budgetin the top left - Click to select the template you want to use
Any changes you make to your report settings, including Included Sections, Formatting options, and which Header/Footer Template is used, will be saved to the currently active template.

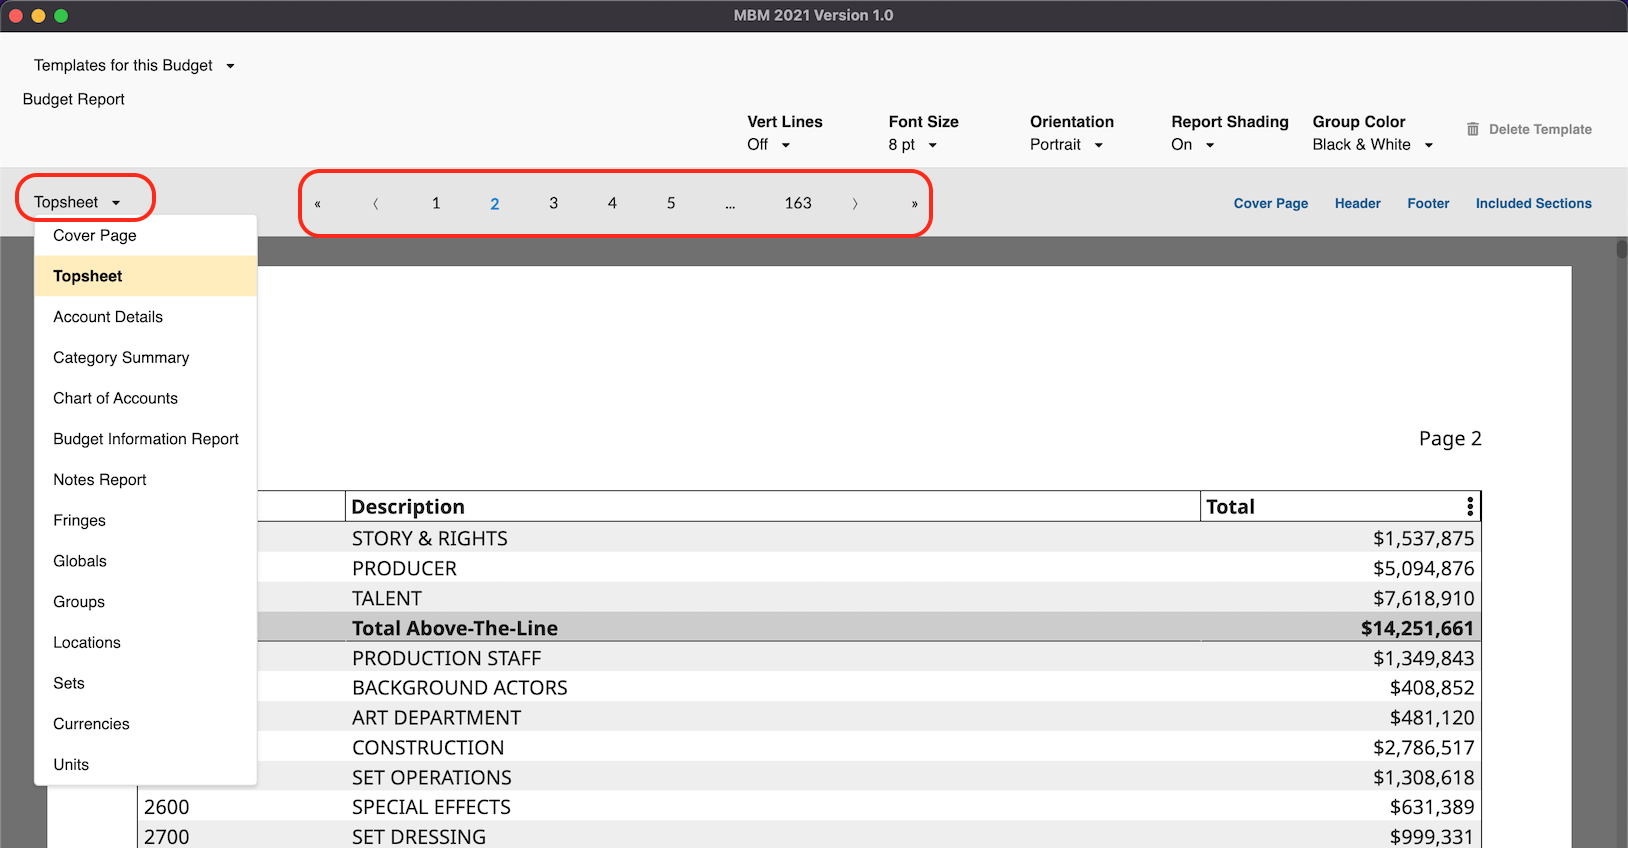
Report Formatting Options
You have options to control the formatting and look of your report.
| Option | Description |
|---|---|
| Vertical Lines | Turns on or off vertical lines between columns in the report |
| Font Size | Defaults to 8pt, but can be bumped to 10pt or reduced to 6pt depending on your report needs |
| Orientation | Switches between Portrait (vertical) and Landscape (horizontal) page orientation |
| Report Shading | Turns on or off the light grey background to alternate rows; does not change the shading on total rows |
| Group Color | Determines if lines colored by their applied groups should be shown in that color or plain black & white |

Report Sections
Use the left quick-navigation drop-down menu to skip to any page of the report based on its section (Cover Page, Topsheet, Category Summary, Account Details, Chart of Accounts, etc.).
You can also use the page numbers and Previous/Next buttons across the top of the interface, or simply scroll through the entire report.
Included Budget Sections
To select which reports to run and which accounts are included, click the Included Sections button on the right-hand side of the Reports Setup Screen.
See Included Sections for more details.

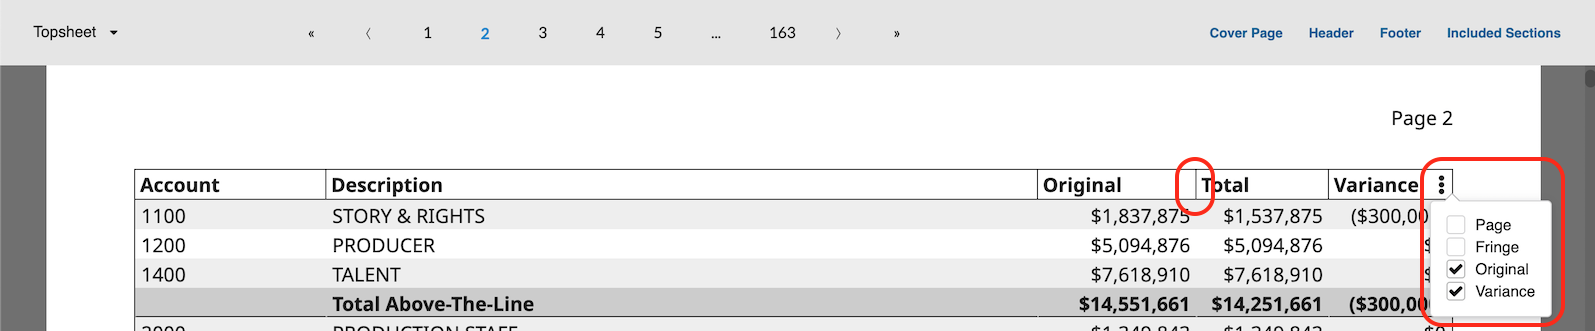
Adjusting Report Columns
Column widths can be adjusted by dragging each column divider. You can show or hide columns by opening the menu button (three dots) in the column header and selecting the columns you want to display in the report.
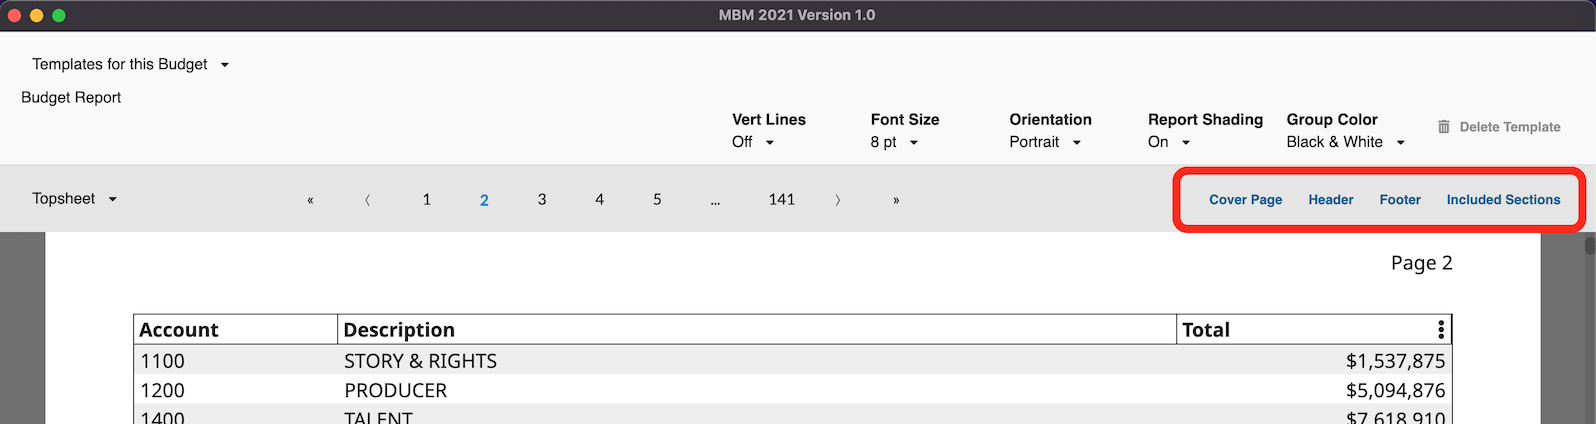
Cover Page, Header, & Footer
Click the Cover Page, Header, or Footer buttons anywhere in the report to access the Cover Page, Header, and Footer screen.
See Cover Page, Header, and Footer for more details.
Outputting Your Report
Once you have made all the selections you want for Included Sections, report formatting, and layout, click EXPORT PDF to save a PDF file of your report or click PRINT to print directly to your connected printer. Depending on your system setup you may need to take a couple of additional steps to trigger the print.